Stop Motion Experiment: Marvello

Here is my first stop motion animation.  Very basic!  Brendon made the sound track:

Now I will have to do another one.

(I’ve been documenting everything I’ve learnt so far about stop motion animation, from how to build the animation stand to what camera to use.  You can find all the posts under the stop motion category of my blog.)

Learning about Stop-motion: The Animation Stand

So far, I’ve written about the software and the camera needed for stop motion animation.  Next – the “animation stand” – a  special tripod for holding the camera in just the right position.  An animation stand has to be really solid, to stop any unwanted movement, and it has to hold the camra (and possilby, lights) very securely.

I needed an animation stand that would hold the camera pointing downwards, because I want to animate using paper and small objects – which is easier to do working on a flat surface, with the camera taking pictures from above.

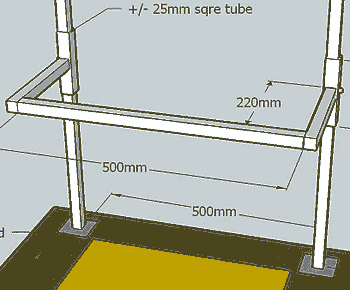
Brendon designed the stand for me.  He based it on this very useful page on how to create an animation stand. The measurements were adapted for my needs – the shape of my camera and the size I wanted.  He also got some help from this forum thread.

Here is his final design.  The measurements were according to the camera I chose.  When the arm is at it’s maximum height, and the camera zoomed lense zoomed back, the “view area” fills the picture exactly. (To see the measurements more clearly, click on the image to view it full size) More

Learning about Stop-motion: The Camera

One of my most difficult decisions in setting up for stop-motion was choosing the camera.

Most articles on stop-motion for beginners recommend that you start with a simple web-cam. It’s cheap and effective.  But I already knew that I wanted to be able to be able to zoom into detail areas, so the images need to be fairly high res.   Web-cams produce low resolution images, and so do most other hand-held video cameras.  Also – a decent entry-level video camera is much more expensive than a good quality digital stills camera.

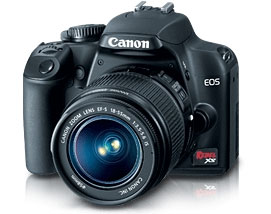
So I started looking for a digital still camera.  These are the things to look for when buying a digital still camera for stop-motion: More

Learning about Stop-Motion: The Software

In my previous post on stop-motion animation, I got a little ahead of myself and jumped straight to showing my first experiments.  I want to back track a little and start with what I learnt while creating a stop-motion setup.

Today’s post is about the software choices for creating stop-frame animation.

I’m using something called frame-grabber software.  Frame-grabbers help to take the guesswork out of creating a stop-motion animation.  When animating without a frame-grabber, you take a picture, move the object and take another picture.   You need to guess how far to move things, and remember which direction you’ve just moved them in.  Sounds simple until you have multiple things moving at different speeds!

Frame-grabbers work like this: More

Stop-motion Experiment Day 1

After many weeks of teaching, I’ve taken some time off to focus (at last) on learning how to make a stopframe animation.  Brendon set up a basic animation rig for me, but I’ll write about the rig, software and equipment in a future post.

Today was all about remembering how to use the camera and the frame-grabber software, and fine tuning the animation stand, so I just made some very rough animations using salt on glass.

For the uninitiated, stopframe animation is when you animate objects or drawings by  taking a picture, moving something, taking another picture, moving something again, and so on.  This job is made a lot easier by using frame-grabber software that let’s you preview how to move the object before you take the picture.  The camera sends a “live feed” image of the scene you are animating to your computer, which is what makes all of this possible. But.. I’ll explain how that works in the upcoming post on the software setup I’m using. 🙂

Lessons learnt today: More